


How to Stop Damp at the Base of My House?
Working out how to stop damp at the base of your house is mostly a diagnosis job. Get the root cause right and the fix is usually simple and cheap. Get it wrong and you throw money at the wrong problem while the damp keeps returning. Older buildings get blamed most often, but these damp problems turn up on houses of any age, and they tend to show worse over the colder months. Either way, the first job is working out what’s actually wetting the wall.
If the bottom two or three courses of brick stay dark and wet long after the rain has stopped, the cause is almost always water reaching the lowest courses from outside, not groundwater rising up from below. Most people are told it is rising damp. Usually it is not.
There are four common culprits: rising damp, penetrating damp, a bridged damp proof course, and rain splashback. Get the cause right and the fix can be as simple as a tin of treatment, like SplashGuard for splashback. Here's how to tell them apart and what actually fixes each one.
What Damp at the Base of a Wall Looks Like
Each of these is easy to write off as ordinary weathering. However, they each point to moisture that shouldn’t be there:
- Lower courses that stay dark and wet after rain, while the rest of the wall dries off
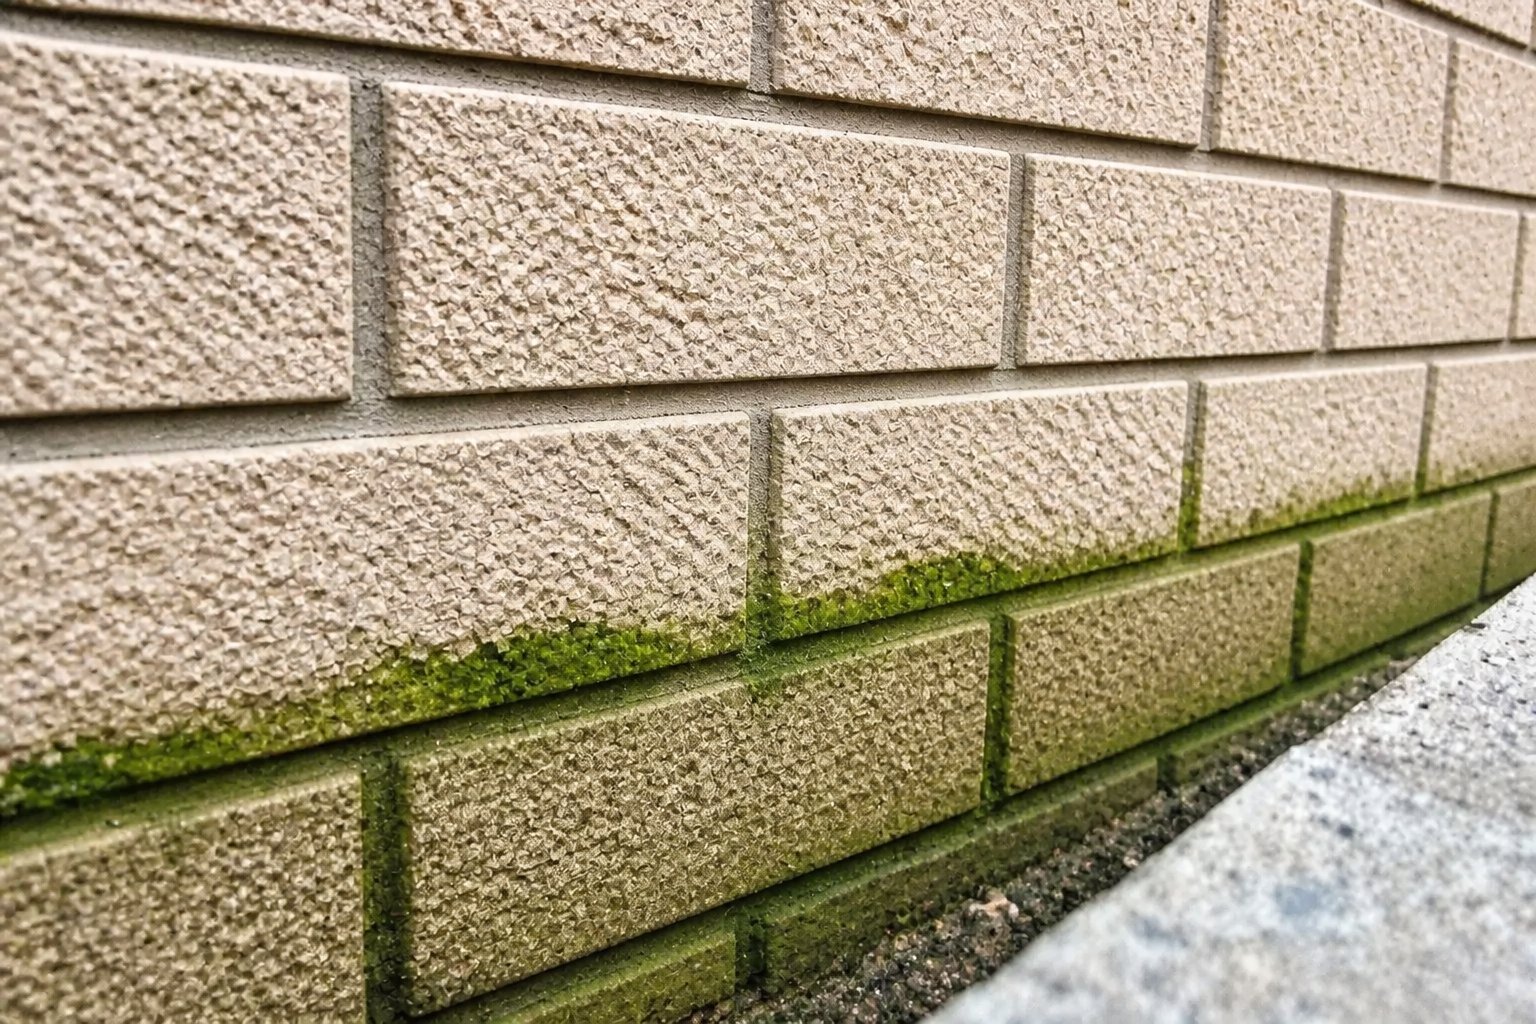
- Green algae or black staining along the base
- White, crusty salt patches (efflorescence)
- Crumbling, soft mortar joints
- Flaking or blown brick faces, where the surface has come away
- A musty smell, or a damp patch inside, low down near the skirting
Two of these tell you more than the rest. Green algae needs constant moisture to grow, so a green base means the wall is not drying out between downpours. Flaking brick is freeze-thaw damage: water soaks into the brick, then expands by around nine per cent when it freezes, forcing the face off over winter. The best looking house on the street still looks neglected with a wet green strip along the bottom, and that strip is the wall telling you it never fully dries.
The Four Causes of Damp on External Walls
Four different problems produce nearly the same wet patch. The fixes range from a single product to a specialist job, so the diagnosis matters more than anything else here.
1. Rising Damp
Where the water comes from: Groundwater drawn up through the masonry where the damp proof course is missing or has failed
Telltale sign: Constant, whatever the weather; a tide mark up to about 1m; white salts
Rough fix: Specialist diagnosis; a new chemical DPC only if genuinely confirmed
2. Penetrating Damp
Where the water comes from: Rain driven in through cracks, failed pointing or leaking gutters
Telltale sign: Worsens after rain; patches can sit at any height
Rough fix: Repair the defect, then protect the masonry
3. Bridged Damp Proof Course (DPC)
Where the water comes from: A raised patio, path, decking or border sitting above the DPC line
Telltale sign: Damp tracks the height of the raised surface
Rough fix: Lower the ground level or fit drainage
4. Rain Splashback
Where the water comes from: Rain bouncing off paving, patio or gravel back onto the lowest courses
Telltale sign: Worsens within hours of rain; tracks the line of the hard surface
Rough fix: Improve drainage, then treat the splash zone with a breathable water repellent
Rising and penetrating damp are the two most people have heard of. Bridged DPCs turn up wherever a patio or border has been built up over the years. The fourth, rain splashback, is the one almost nobody mentions, but it’s one that warrants a deeper look.
Rain Splashback: The Cause Most People Miss
One number worth knowing: building regulations require the damp proof course to sit at least 150mm, about two brick courses, above the ground. That clearance exists because rain reliably splashes up to roughly that height every time it rains hard.
Splashback is simple. Water lands on a hard surface next to the wall (paving slabs, concrete, tarmac, a driveway), bounces straight back up, and soaks the lowest courses again and again. It is mechanical, not capillary, so it happens even where the damp proof course is perfectly sound.
That is exactly why it gets mistaken for rising damp. It wets the same low band, shows up inside at low level, and the splashing water carries ground and road salts up with it, so the wall draws in even more moisture. The harder the surface, the worse it is: slabs and concrete throw water back, while loose gravel soaks up most of the energy and splashes far less.
Surveyors regularly find walls written off as rising damp where the real cause was passing traffic or rain splashing off a hard surface onto the lower courses. If your damp sits low, follows the line of your paving, and worsens after rain, splashback is the prime suspect.
How To Tell The Causes Apart Yourself
You can narrow this down before paying anyone, with nothing more than a tape measure:
Timing
Worsens within hours of heavy rain and eases in dry spells? That points to penetrating damp or splashback. Damp that stays constant all year round points to rising damp.
Height
Measure the damp band. The bottom 100mm to 300mm, tracking a patio or path, points to splashback or a bridged DPC. A tide mark up to about a metre points to rising damp. Above 1.5m effectively rules rising damp out, because water will not climb that high.
Salts
White patches that keep coming back after you wipe them suggest groundwater salts, which lean towards rising damp.
Ground level
Find the damp proof course, a thin horizontal line in the mortar about 150mm up. Check whether paving, soil or decking sits above it. Anything above that line is bridging it.
Algae
Green growth at the base, next to a hard surface, means the wall is staying wet. That fits splashback.
One caveat on damp meters. A cheap pin-type meter reads surface moisture and salts, not how wet the wall is deep down, so it throws false positives on a salty wall and is no basis for a four-figure decision. For anything invasive, get a salt analysis or a qualified surveyor (look for PCA membership or a CSRT qualification) to confirm before you spend. Kingfisher's free technical advice and troubleshooting page can also help you read the signs.
What About Condensation?
Worth ruling out, because it’s the most common damp of all and it’s regularly mistaken for the rest. Condensation forms when warm, moist indoor air meets a cold surface, so it usually shows up on cold external walls, in corners, behind furniture and around windows, often with black mould rather than a clean tide mark. If your low-level damp comes with streaming windows, a musty smell and black spotting, the cause may be inside, not outside.
The fixes are about moisture and airflow, not sealers: use extractor fans in the kitchen and bathroom, keep trickle vents open, avoid drying laundry indoors, and improve ventilation generally. If black mould is already established, deal with it directly with a proper mould treatment rather than painting over it.
How to Fix Each Cause
The wrong fix is expensive and the damp comes back anyway. Match the fix to the cause, and always deal with the source before you protect the surface.
Rising damp. Confirm it with a qualified surveyor and a salt analysis first. Install a new chemical damp proof course only if the original is genuinely absent or has failed. Plenty of homes never need one.
Penetrating damp. Repair the defect before anything else. Repoint crumbling mortar, fix leaking gutters and downpipes, and seal any cracks. Then protect the masonry so it stops soaking up rain.
Bridged DPC. Lower the offending patio, path or border to restore the 150mm clearance, or fit a drainage channel or French drain between the wall and the hard surface. You don’t need DPC injection for a bridge.
Rain splashback. Improve drainage where you can; a gravel margin along the base throws back far less water than slabs. Then treat the splash zone, the lowest courses, with a breathable water repellent so the wall stops absorbing the splash.
The common thread: once the source is dealt with, protecting porous brick, render or stone with a breathable treatment stops the wetting cycle from starting over.
Protecting the Base of Your Wall with Splashguard

The obvious move is to waterproof the wall. The catch is that the wrong kind of sealer makes things worse. A film-forming sealer blocks liquid water, but it also blocks water vapour leaving the wall. Moisture gets trapped, coatings bubble, and in winter that trapped water freezes and flakes the brick face off.
A breathable treatment does the opposite. It repels rain while letting vapour escape, so the wall can still dry. SplashGuard is built for exactly this job. It soaks into porous masonry and forms an invisible, breathable, water-repellent barrier, and it dries clear, so it does not change the look of your brick, stone or render.
A few practical points:
-
It can be applied to slightly damp surfaces, which matters in the UK where walls are rarely bone dry
-
Two coats on porous brick, sandstone and limestone; one coat on denser materials such as slate, granite or engineering brick, with around 12 hours between coats
-
A 5 litre container covers up to 12.5m² over two coats, applied by brush, roller or low-pressure sprayer
-
It suits brick, render, stone, concrete and the base of walls and extensions. It is not suitable for polished stone
-
Wear gloves and eye protection and follow the safety data sheet when applying
It sits in Kingfisher's wider range of exterior masonry sealers. Kingfisher has manufactured sealants and coatings in the UK since 1988, holds ISO 9001 certification, and is rated 4.91 out of 5 across more than 1,600 customer reviews. If splashback is your problem, SplashGuard is the Kingfisher UK solution.
Frequently Asked Questions
How do I know if it’s rising damp or rain splashback?
Check the timing and height. Splashback worsens within hours of rain and sits in the lowest 100mm to 300mm, tracking your paving line. Rising damp stays constant whatever the weather and shows a tide mark up to about a metre.
Why is the bottom of my wall always green?
Green algae needs constant moisture to grow. If it keeps returning at the base next to a hard surface, the wall is not drying between downpours, usually because rain is splashing back onto it.
My patio is above the damp proof course. Is that rising damp?
No. That’s a bridged damp proof course, often with splashback on top. The fix is drainage or lowering the ground level, not a chemical damp proof course.
Can I apply SplashGuard when the wall is already damp?
Yes. SplashGuard can be applied to slightly damp surfaces. Use two coats, about 12 hours apart, on porous brick, stone or render.
Could condensation damp or excess moisture be the real cause?
Often, yes, and it’s the cause most people overlook. Condensation damp comes from inside, not outside. If the damp sits in corners or behind furniture rather than tracking the paving line, excess moisture indoors is the likely culprit. The fix is airflow, not a sealer. Proper ventilation and lower indoor humidity reduce condensation far better than any coating.
Why are older buildings more prone to damp at the base?
Older buildings often have no damp proof course at all, or an early one that has broken down, so the building fabric draws up ground water more readily. Solid brick walls with no cavity let unwanted moisture through. A low tide mark with salt contaminated plaster then gets called rising damp, when the real cause in an old house is just as often penetrating damp from cracked render, worn pointing or leaking gutters.
Author: Leon


