


How to Fix Damp Walls: Causes, Treatments & Long-Term Solutions
Understanding how to fix damp walls begins with recognising that “damp” is not a diagnosis but rather a symptom. Across the UK in properties of all ages, moisture can present as mould in bedrooms, staining at skirting level, peeling wallpaper, salt contamination, or as a persistent musty smell. The visible symptoms provide important clues to the origin of the problem, but are rarely the root cause. Even with inspection cameras, damp meters and other diagnostics, correct diagnosis often relies on a combination of detective work, experience and occasional lateral thinking.
The underlying issue may be condensation, rising damp, penetrating moisture, or an internal plumbing defect. Each behaves differently and requires a different approach. And to make matters more complicated there are frequently multiple factors working in concert which makes diagnosis even more challenging!
Treating the surface without identifying the source almost guarantees recurrence. Correct diagnosis always comes first. At Kingfisher Building Products, our approach is based on practical site experience and system-based damp proofing, addressing the root cause before specifying the treatment.
What Causes Damp Walls?
Before deciding how to fix damp walls, establish the mechanism allowing excess moisture to enter or accumulate in your home. The four most common causes are outlined below.
1. Condensation (Most Common)
Condensation occurs when warm, moisture-laden air contacts cold surfaces (like windows or cold outside walls). It is primarily a ventilation and lifestyle issue rather than a structural defect. Poor ventilation causes moist air to linger, making rooms feel cold and damp.
Common signs:
- Kitchens, bathrooms and laundry areas generate the most airborne moisture, so tend to be prime candidates
- Black mould growth in corners, on ceilings, or behind furniture
- Water droplets on windows
- Damp patches on cold external-facing walls (wall is cold to touch)
- Musty smell in affected areas
- Worse during colder months
2. Rising Damp
Rising damp occurs only on ground floors when ground moisture travels upwards through masonry by capillary action. This typically results from a failed or bridged damp proof course (DPC). The damp proof course is a continuous waterproof layer, usually sandwiched along a horizontal mortar joint, and not always visible from the outside. In period properties where these may have been made of tar bitumen, this material degrades over time OR slate DPC’s have overlap joints which can be weak points.
Common signs:
- Tidemarks up to approximately one metre high on internal walls
- White salt deposits (efflorescence) on plaster and mortar
- Peeling wallpaper and plaster disintegrating near skirting boards
- Damp surfaces that remain wet over time
- Exposed timbers show signs of wet rot damage (spongey) or dry rot damage (crumbly) white strands of fungal infection
3. Penetrating Damp
Penetrating damp is caused by external defects allowing rainwater to pass through the building fabric.
Common causes:
- Cracked render
- Leaking gutters and leaking roofs
- Porous bricks or stonework
- Damaged brickwork and defective pointing
- Debris blocking drainage
It often worsens after heavy rain. Damp patches may appear randomly
4. Leaks & Plumbing Issues
Internal leaks can mimic other forms of damp but are typically localised.
Common sources:
- Pipework within walls or floors
- Faulty seals around baths or showers
- Roof defects leading to water ingress
- Accidental pipework damage - fixing screws or nails penetrate a hidden pipe
These problems often appear suddenly rather than gradually.

How to Identify the Type of Damp
Diagnosis relies on pattern recognition and expert advice. Damp leaves clues in its location, behaviour, and timing.
Visual Indicators
- Ground-level staining with salt deposits → likely rising damp
- Black mould in corners or behind wardrobes → typically condensation
- Patches that darken after rainfall → penetrating damp
- Isolated bubbling paint or damp smell, dripping water → possible plumbing leak
Location Patterns
- Lower metre of internal ground floor walls → rising damp
- Upper walls or ceilings → roof or penetrating defects
- Cold exterior wall surfaces → condensation
Seasonal Clues
- Worse in winter → condensation
- Worse after rain → penetrating damp
- Consistent at ground level year-round → rising damp
Using a moisture meter can help confirm the extent of dampness in affected areas.
Correct identification prevents unnecessary expense and ensures the right materials are specified.
How to Fix Damp Walls in 3 Steps
Once diagnosed, repair follows a logical sequence. Skipping stages is one of the main reasons damp problems return.
Step 1: Fix the Root Cause
Internal surface treatment without identifying the source of moisture control will likely fail.
Depending on the diagnosis:
Condensation
Improve ventilation to reduce condensation (ensure trickle vents on double-glazed windows are open, ensure bathroom or kitchen extraction fans are clean and working efficiently. Consider replacing elderly fans with modern higher efficiency units, including heat recovery vents, that don’t limit heat loss. Open a window for half an hour if the air quality feels heavy with humidity.
Penetrating Damp
Repair leaking gutters, leaking roofs, and damaged exterior walls. Even small leaks from rainwater goods, for example, can allow surprising amounts of water to accumulate over time, especially if the masonry is porous, so diligent maintenance is key.
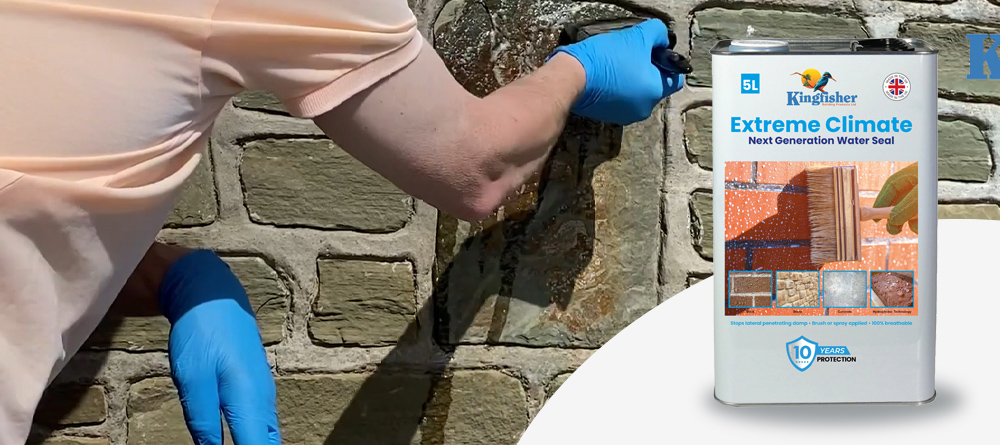
Unfinished porous external masonry should be checked for degraded mortar joints, which should be raked out and re-pointed with pointing mortar, then treated with a microporous (breathable) clear water-repellent (Kingfisher Extreme Climate), to form a protective primary shield over the entire brick or stone wall.
Leaking render should be examined for cracks or hollowing (where the render debonds from the wall, leaving voids which trap moisture) and repaired as necessary.
Painted exterior walls should be on a full maintenance cycle every ten to fifteen years, finished with a premium masonry coating (Kingfisher Weatherflex) which sheds rainwater and has sufficient elasticity to accommodate thermal expansion and contraction without cracking.
Plumbing leaks
Identify and repair plumbing leaks. Leaks from clean water pipes are usually easiest to locate, as the volume and pressure mean that the source is usually fairly obvious. Less easy to locate are leaks from waste water drainage, as these tend to be intermittent.
Rising Damp
Hack off the contaminated plaster back to bare masonry and install or reinstate a damp proof membrane or damp proof course where rising damp is confirmed. Most brick wall constructions, including cavity walls can be injected to form a new chemical damp proof course, into the mortar joints in the case of migratory creams (like Kingfisher Dri-Wall) or into the bricks in the case of pressure injection fluid (Kingfisher Injection Fluid).
Alternatively, it is increasingly popular to install a waterproof mesh membrane system overlaying the damp area to isolate the damp and create a dry background for plastering.
Step 2: Allow the Wall to Dry
Masonry retains moisture. After repairs, drying out must occur naturally, and remedial repair protocols should be followed strictly to avoid delays or re-works. As a guide:
- Condensation-related issues may stabilise within days
- Treating rising damp may require several months for full drying, (masonry dries out at an average of 30mm thickness per month).
Treating penetrating damp with water repellents, the surface should ideally be surface dry so that the treatment does not leave staining. Residual moisture deep in the substrate (up to 300mm) will evaporate freely through the microporous water-repellent. Kingfisher Stormseal water-repellent is slightly different, in that it can be applied directly to a damp wall. To assist drying:
- Increase airflow
- Use gentle background heating to maintain a constant temperature
- Avoid premature decoration as early application of wallpaper or even silk emulsion paint can trap moisture, leading to further issues
You can replaster onto walls that are drying, BUT standard plasters should never be used post-injection of a DPC or anywhere that groundwater may have saturated. This is because the hygroscopic salts contained in groundwater are highly corrosive to gypsum plasters and plasterboard, causing them to break down. The same goes for plaster contaminated with lateral penetrating damp because earth minerals found in clay bricks and soft stone also contain soluble chlorides, even if the concentration is lower.
To facilitate immediate redecoration, always use Limelite renovating plaster, stocked by Kingfisher, which is formulated to be resistant to salt erosion and evaporative moisture.
Step 3: Replaster & Redecorate Correctly
Finishes must be compatible with the moisture profile of the wall.
- Use salt-resistant plaster (Limelite) where rising damp has occurred and if significant or prolonged ingress from penetrating damp
- Select breathable finishes where appropriate to avoid trapping dampness. Ideally use Limelite finishing plaster
- Avoid early application of standard emulsion paint on wet or damp surfaces, allow a minimum of 3 weeks.
- Do not use vinyl or silk emulsions in the first 12 months
- Do not wallpaper in the first 12 months
Incorrect reinstatement often causes premature failure of decorative finishes.

What Not to Do When Fixing Damp Walls
Experience shows recurring damp is frequently linked to incorrect sequencing.
- Do not paint over active damp or damp surfaces
- Do not ignore ventilation deficiencies that cause poor air circulation
- Do not rely on bleach alone to treat mould
- Do not assume all damp is rising damp without proper diagnosis
- Do not “go it alone”, ask advice from a qualified damp proofing surveyor or manufacturer
Misdiagnosis is one of the most common and costly mistakes in damp remediation and can lead to health problems such as respiratory conditions.
Preventing Damp from Returning
Prevention is maintenance-driven and essential to protect your house from further issues.
- Keep gutters and downpipes clear of debris
- Maintain external paint finishes in good order with regular inspection
- Where water repellents have been applied, make sure these are topped up at recommended intervals
- Repoint frost damaged mortar joints promptly
- If cracks appear in render finishes, investigate and repair
- Improve airflow in kitchens and bathrooms
- Insulate cold external walls where possible to reduce condensation
- Inspect for early signs of staining, damp smell, or musty smell
- Use breathable finishes and damp proof membranes where appropriate
Small proactive measures significantly reduce future risk of dampness and structural issues.
Fixing Damp Walls Properly: Diagnosis Before Decoration
Damp walls are not unusual in UK properties, especially in older buildings, but they are manageable when approached systematically. The key principle is simple: identify the moisture source first, then specify the correct treatment.
When diagnosis is accurate and sequencing is correct, damp proofing systems provide long-term performance rather than short-term cosmetic improvement.
At Kingfisher Building Products, we focus on practical, system-based solutions developed through site experience. If you are unsure about the correct approach for your property, reviewing the relevant product systems or speaking to our technical team can provide expert advice and help ensure the problem is addressed correctly at the outset.
Frequently Asked Questions
Can I fix damp walls myself?
Minor condensation-related issues can often be managed by improving ventilation and applying suitable coatings like anti mould paint. However, widespread or persistent damp, particularly suspected rising damp, should be assessed professionally before treatment.
Will damp proof paint solve the problem?
Damp proof paint blocks residual moisture and staining but does not cure active damp. It must form part of a wider remedial system, including fixing the root cause.
How do I know if it’s rising damp or condensation?
Rising damp is generally confined to the lower metre of internal walls and often includes salt deposits. Condensation is usually associated with black mould and cold external-facing surfaces, particularly in winter.
Author: Jamie


